How to Customize Your IKEA Kitchen: 10 Tips to Make it Look Custom
Hi everyone! This post has been a long time coming and I’m so excited to share it with you! I’ve received a ton of emails and questions about how we made our IKEA kitchen look more custom than the typical kitchen you so often see in the IKEA showroom. So today I’m sharing my tips for customizing your IKEA kitchen! I’ll share my 10 tips and I’ve also included a You Tube video below that will walk you through our kitchen and highlight all the custom touches we added to our IKEA kitchen.
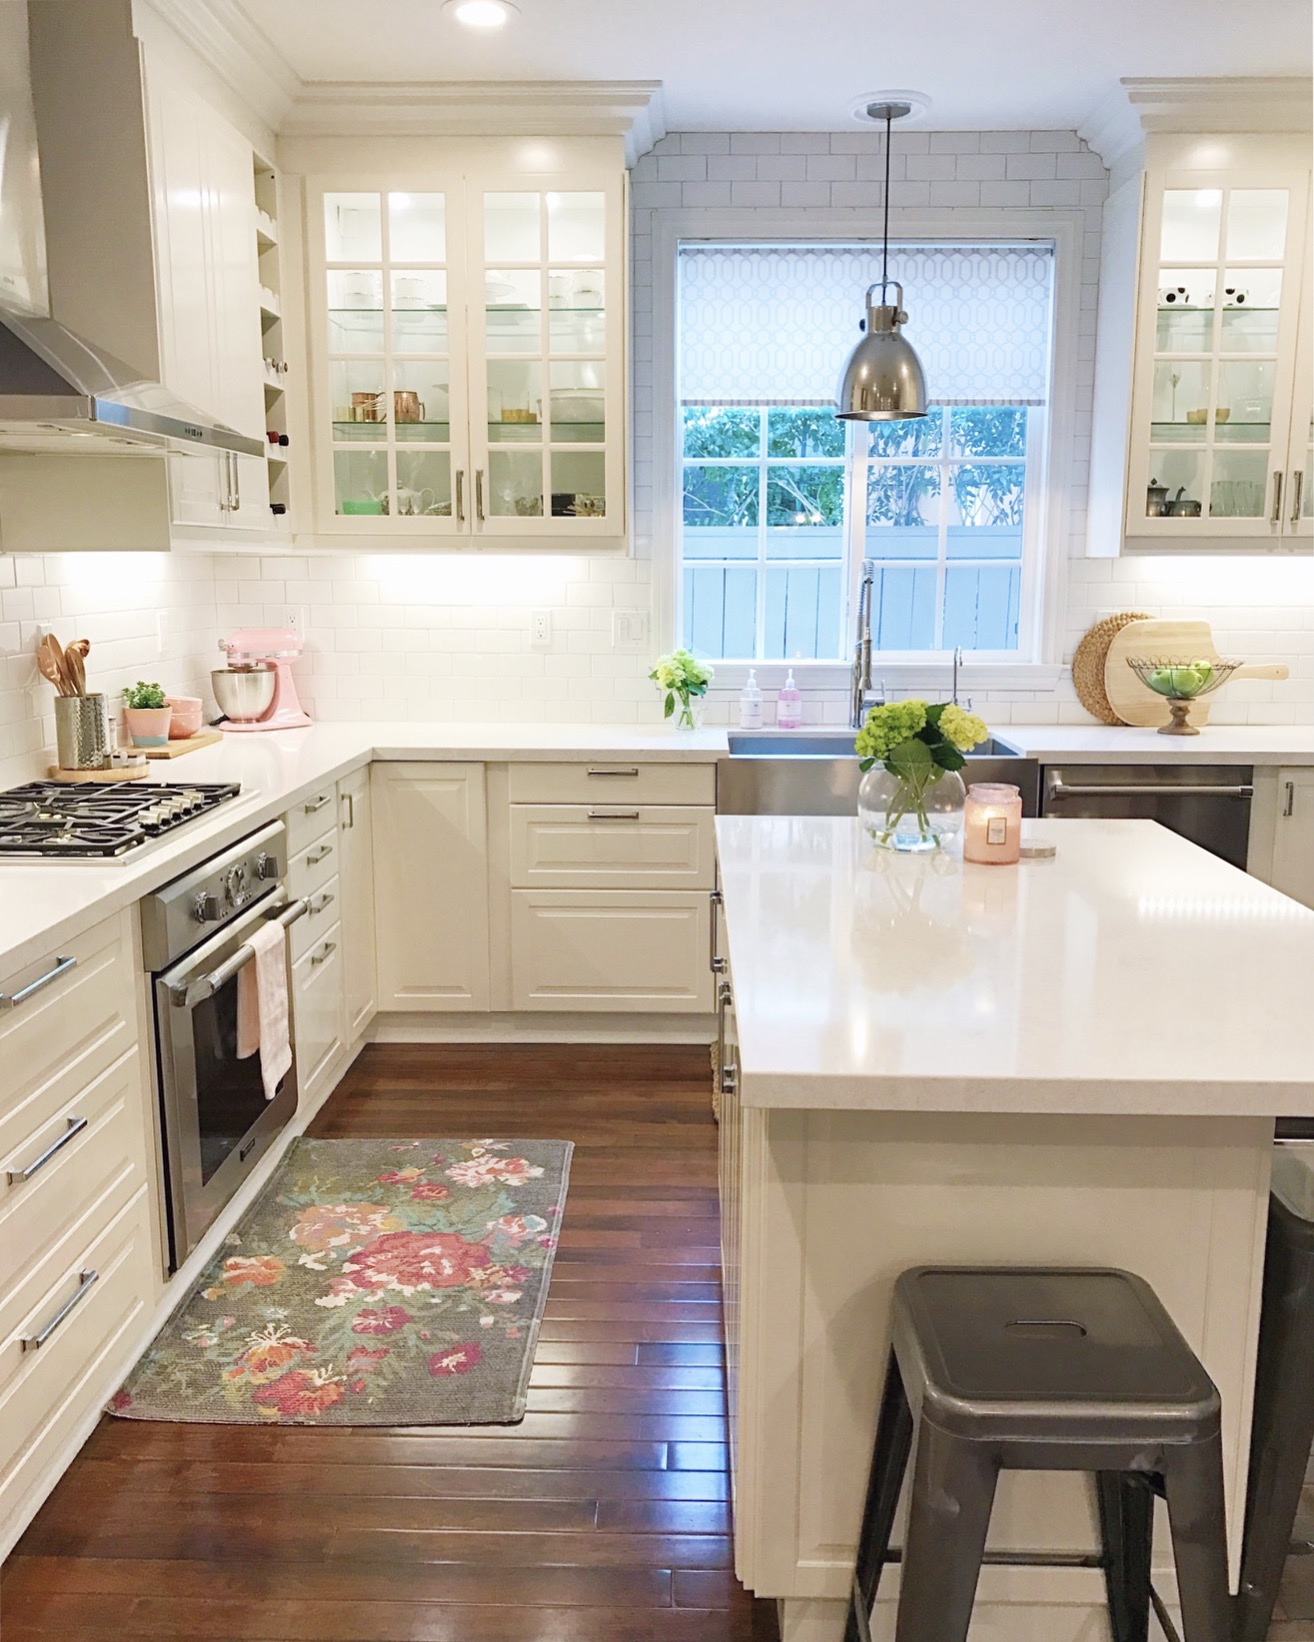
Tip #1: Eliminate the Gap Between the Top of the Cabinet and Your Kitchen Ceiling
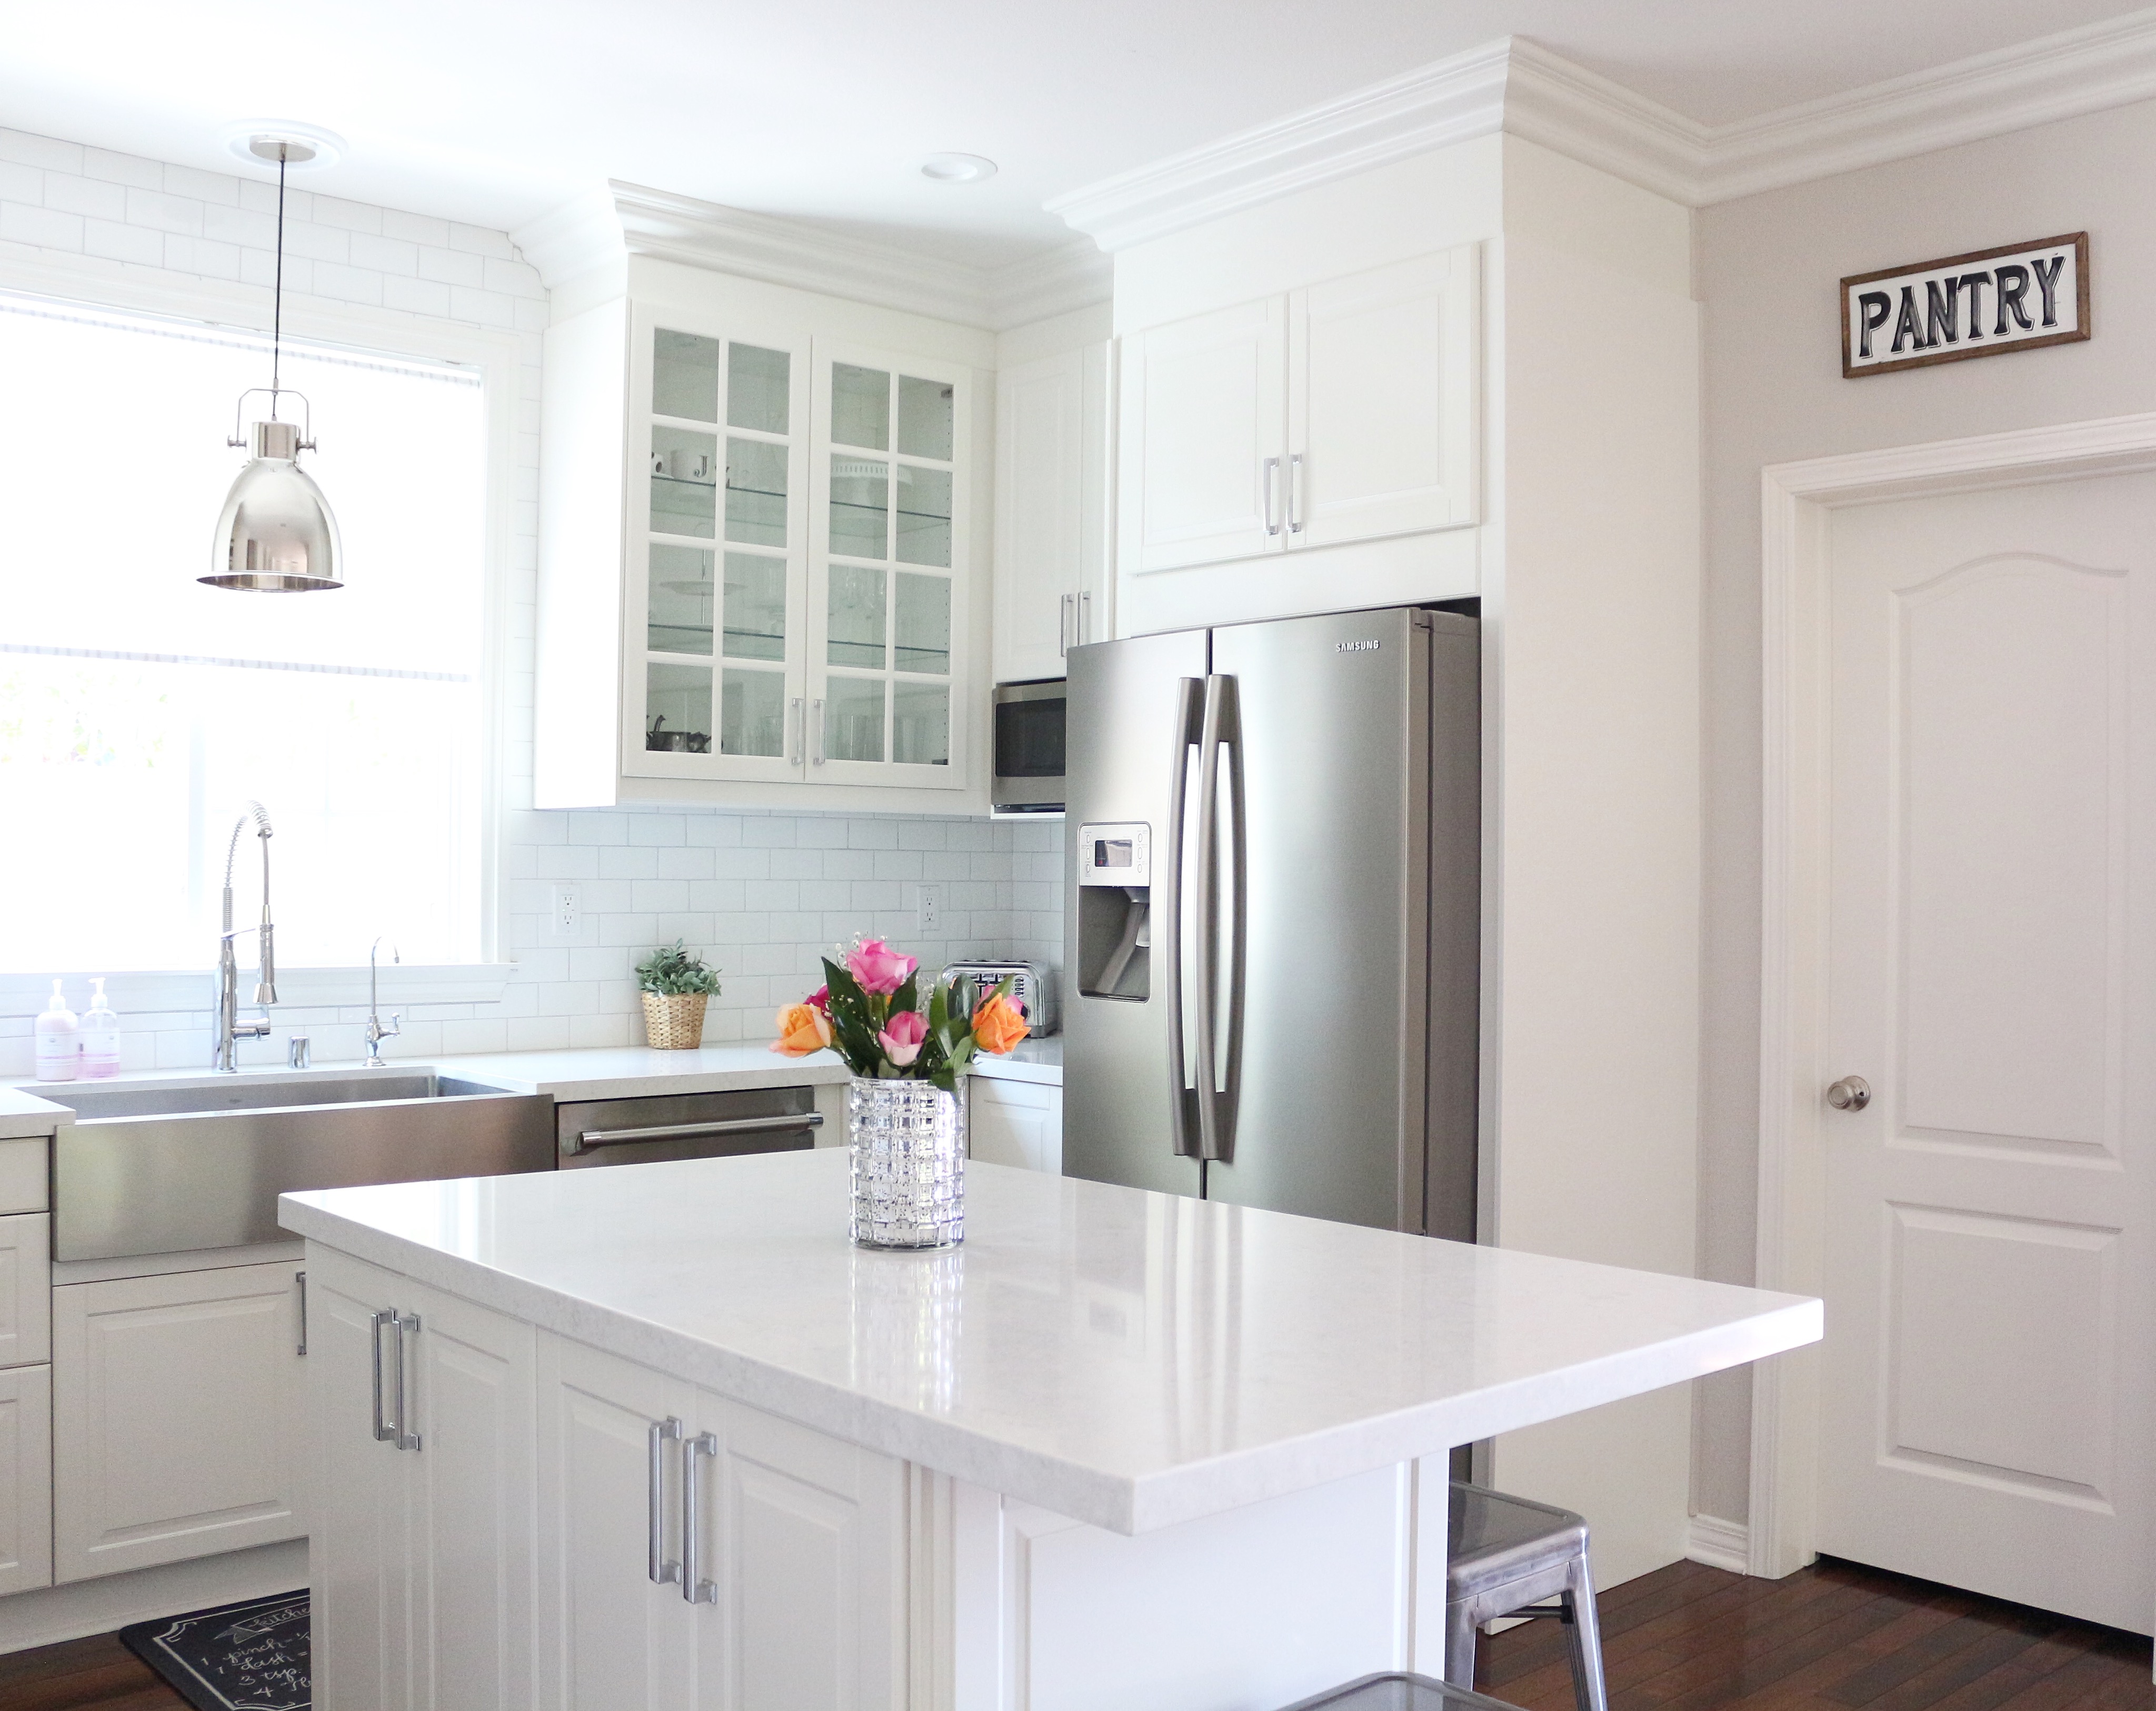
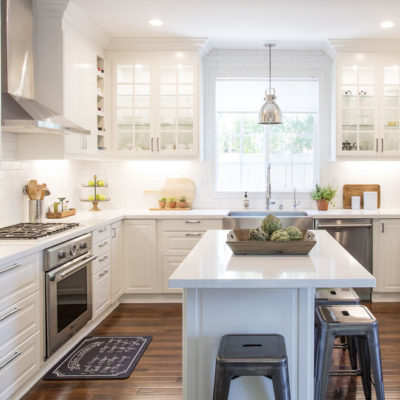
This is a simple upgrade that goes a long way! You can accomplish this by adding bulkhead and crown molding to the top of your IKEA cabinets. Also make sure you take into account the height of your ceiling when selecting the size of your upper cabinets. There is also trim that IKEA offers to compliment your cabinet color and style that can be utilized to eliminate that space and make it more finished. Overall when you eliminate that space or gap your end result is a more custom, finished look!
Tip #2: Upgrade Your Cabinet Hardware
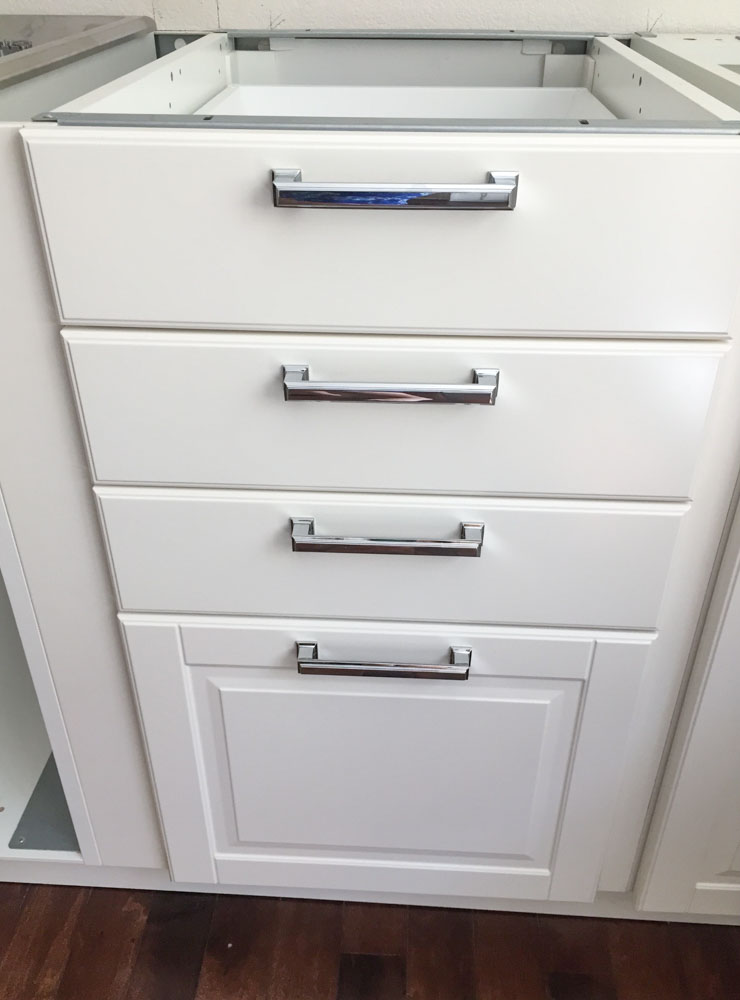
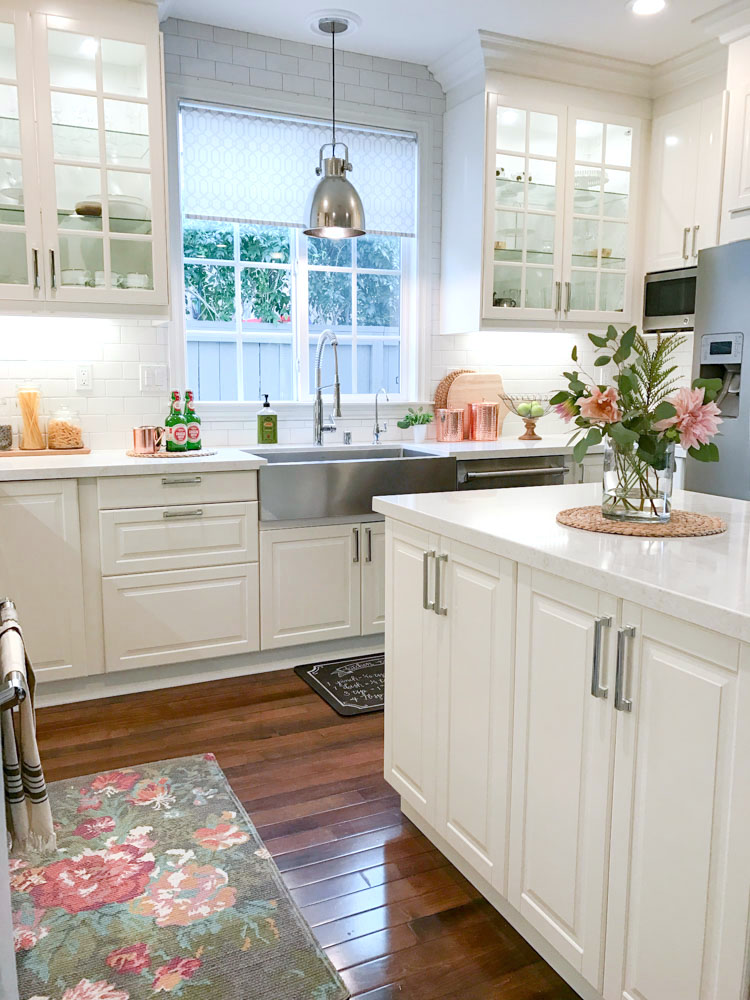
Excuse my “in progress” pic from our kitchen renovation but this one gives you a close-up of our cabinet hardware. To customize your kitchen upgrade your cabinet hardware beyond IKEA’s standard selection. Don’t get me wrong I love their selection and I’m not saying you can’t stick with their options however if you want to customize your kitchen select something different. No offense to those who have IKEA cabinet hardware – they have beautiful options! However, this tip will make your kitchen feel unique instead of the typical IKEA kitchen. There are budget friendly options for cabinet hardware so don’t feel pressured to succumb to IKEA’s choices just because you are on a budget! Extra tip: Invest in something substantial that is the appropriate size and scale to your cabinet doors and drawers. You can shop our exact cabinet hardware and other kitchen items in the pics below.

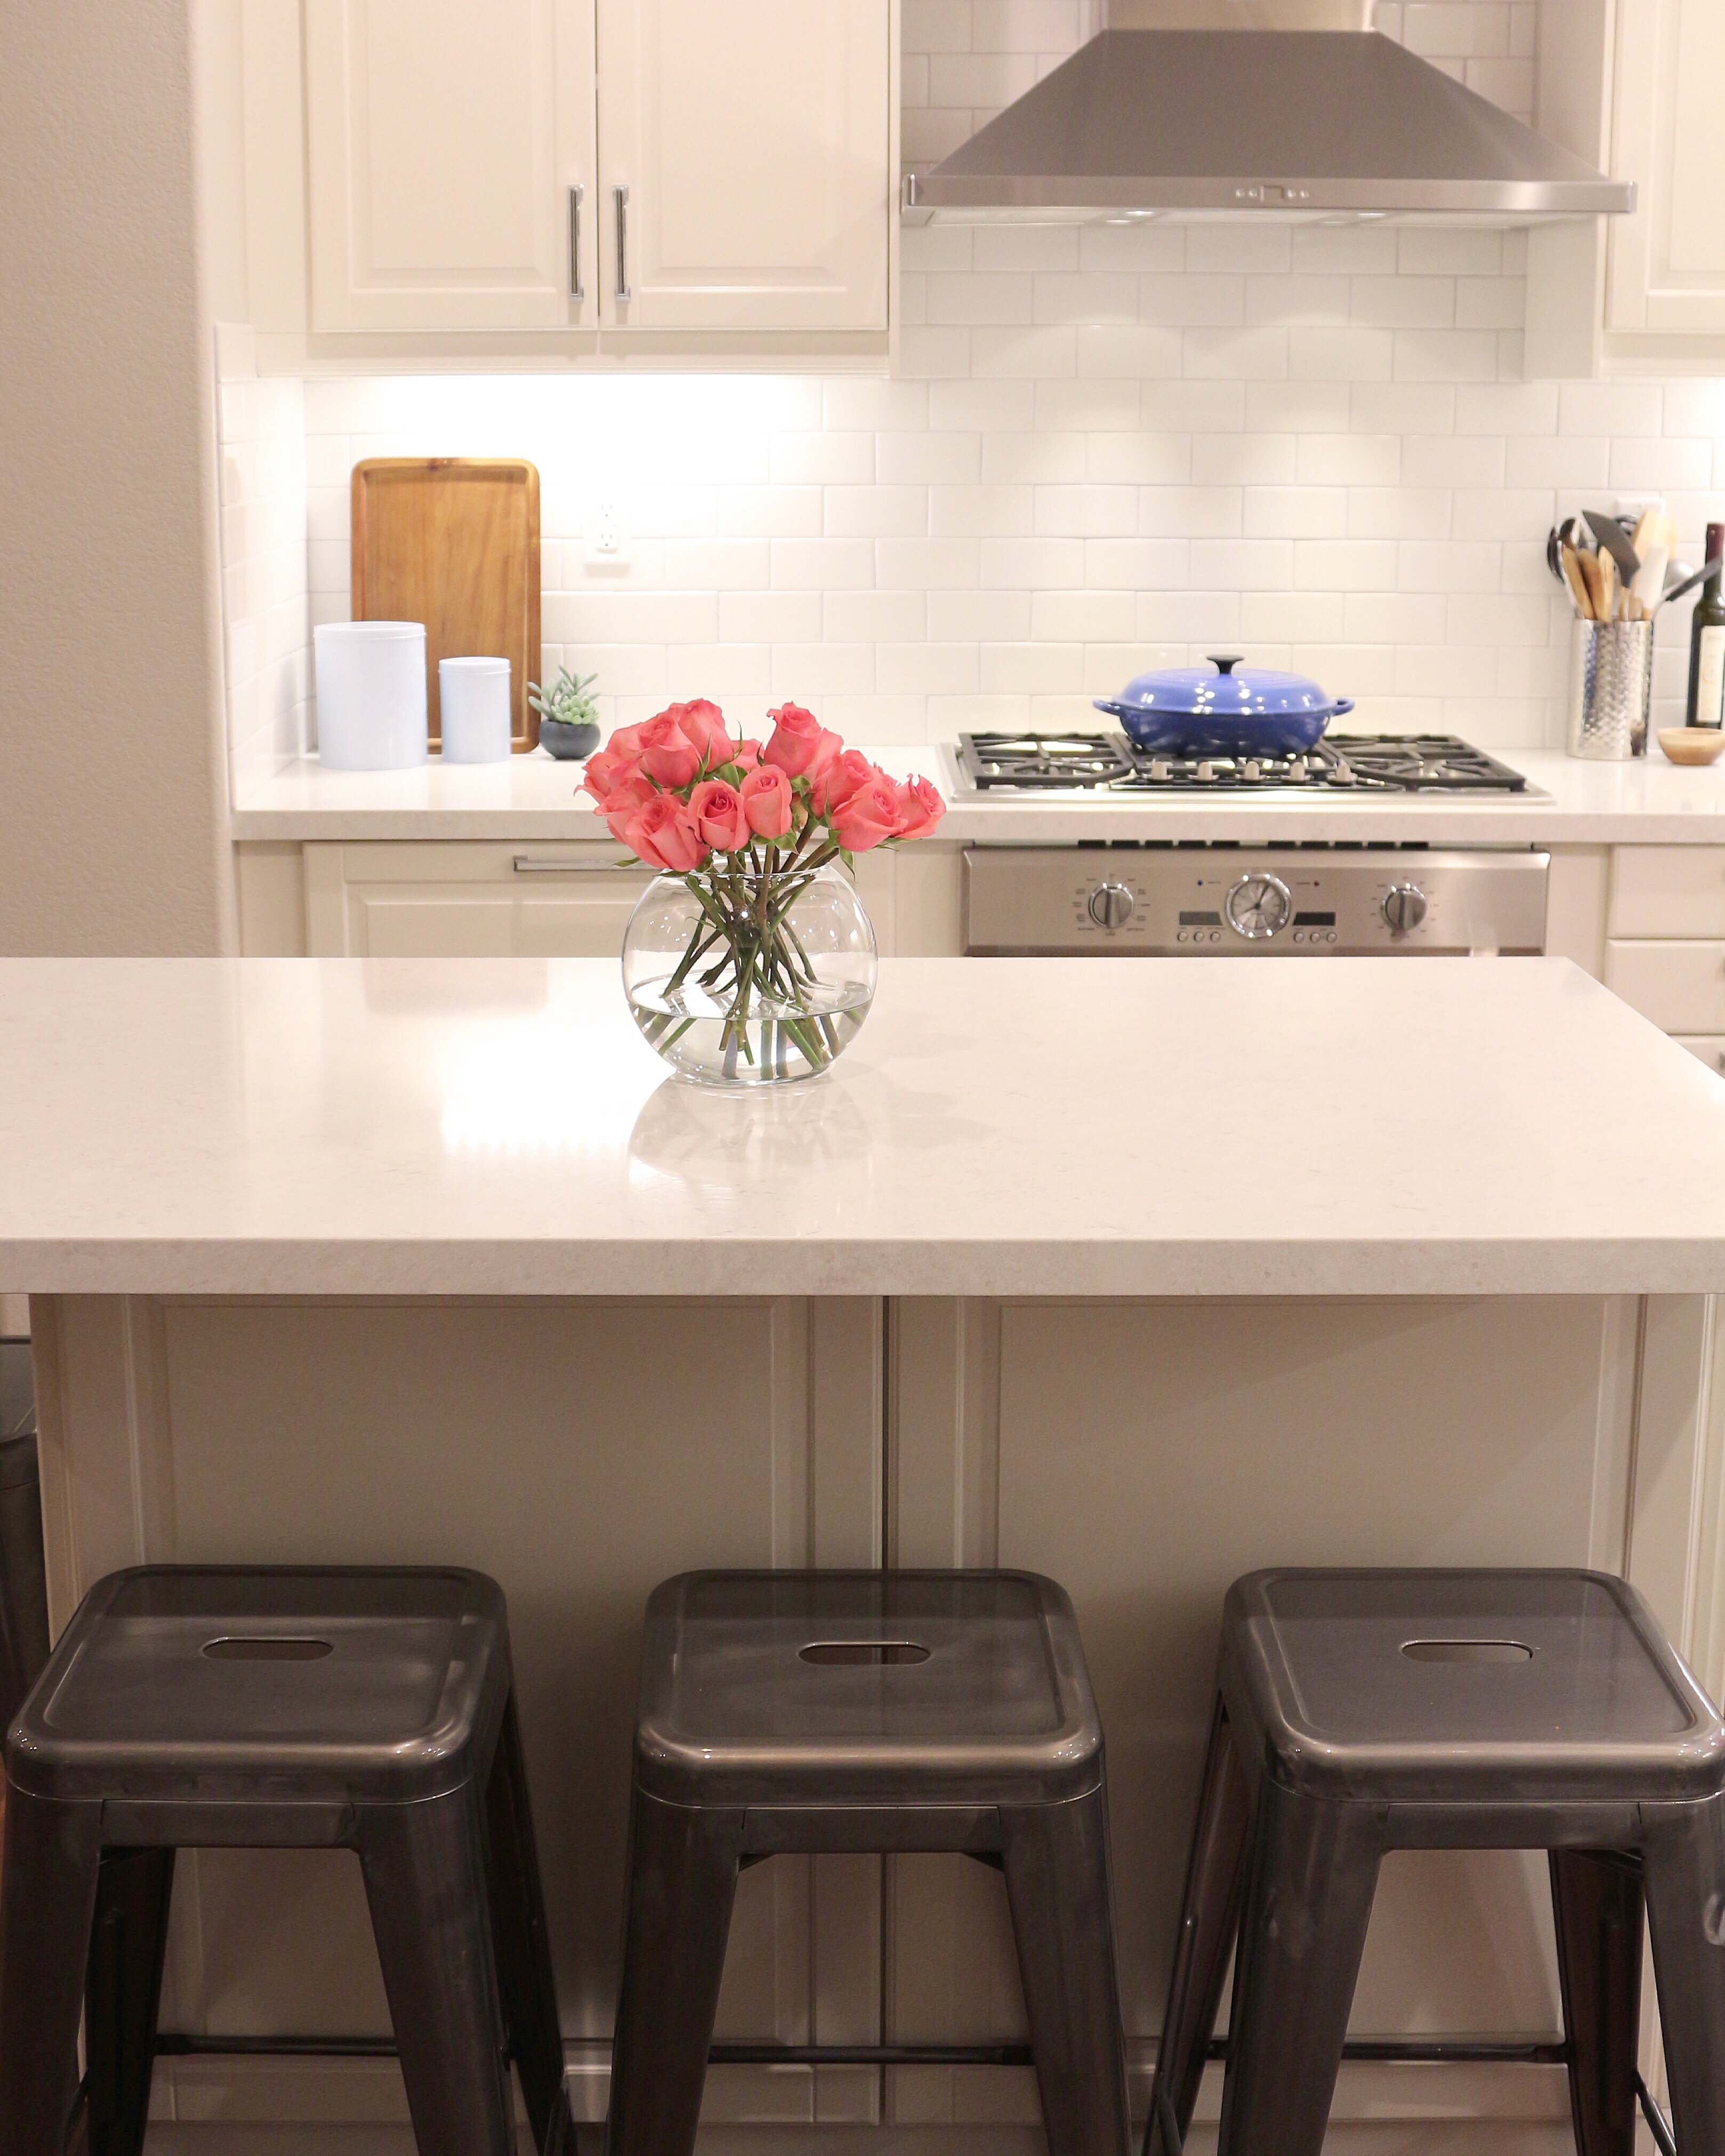
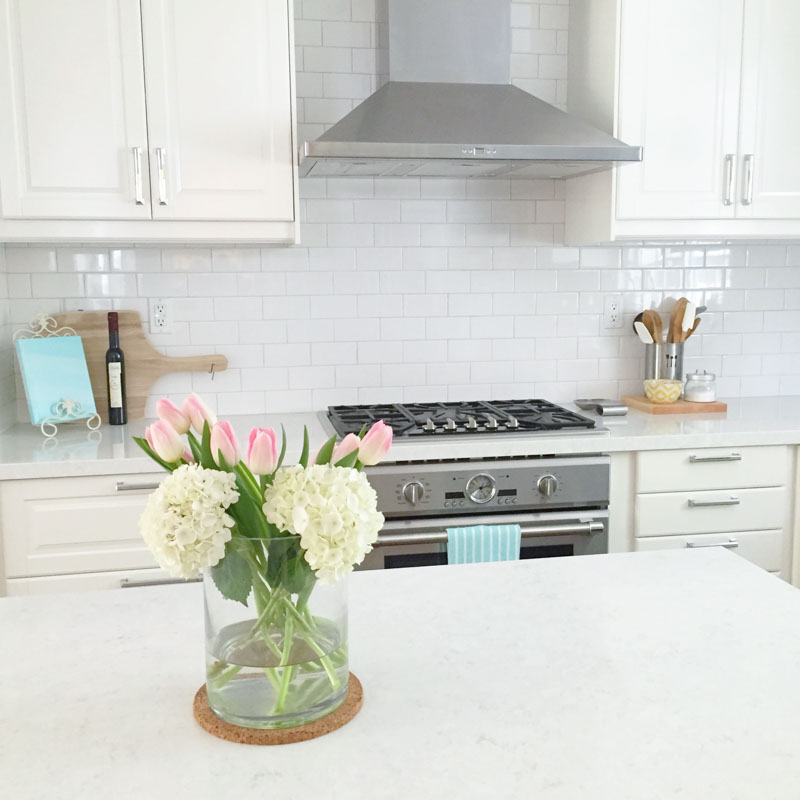
Tip #3: Invest in Professional Appliances
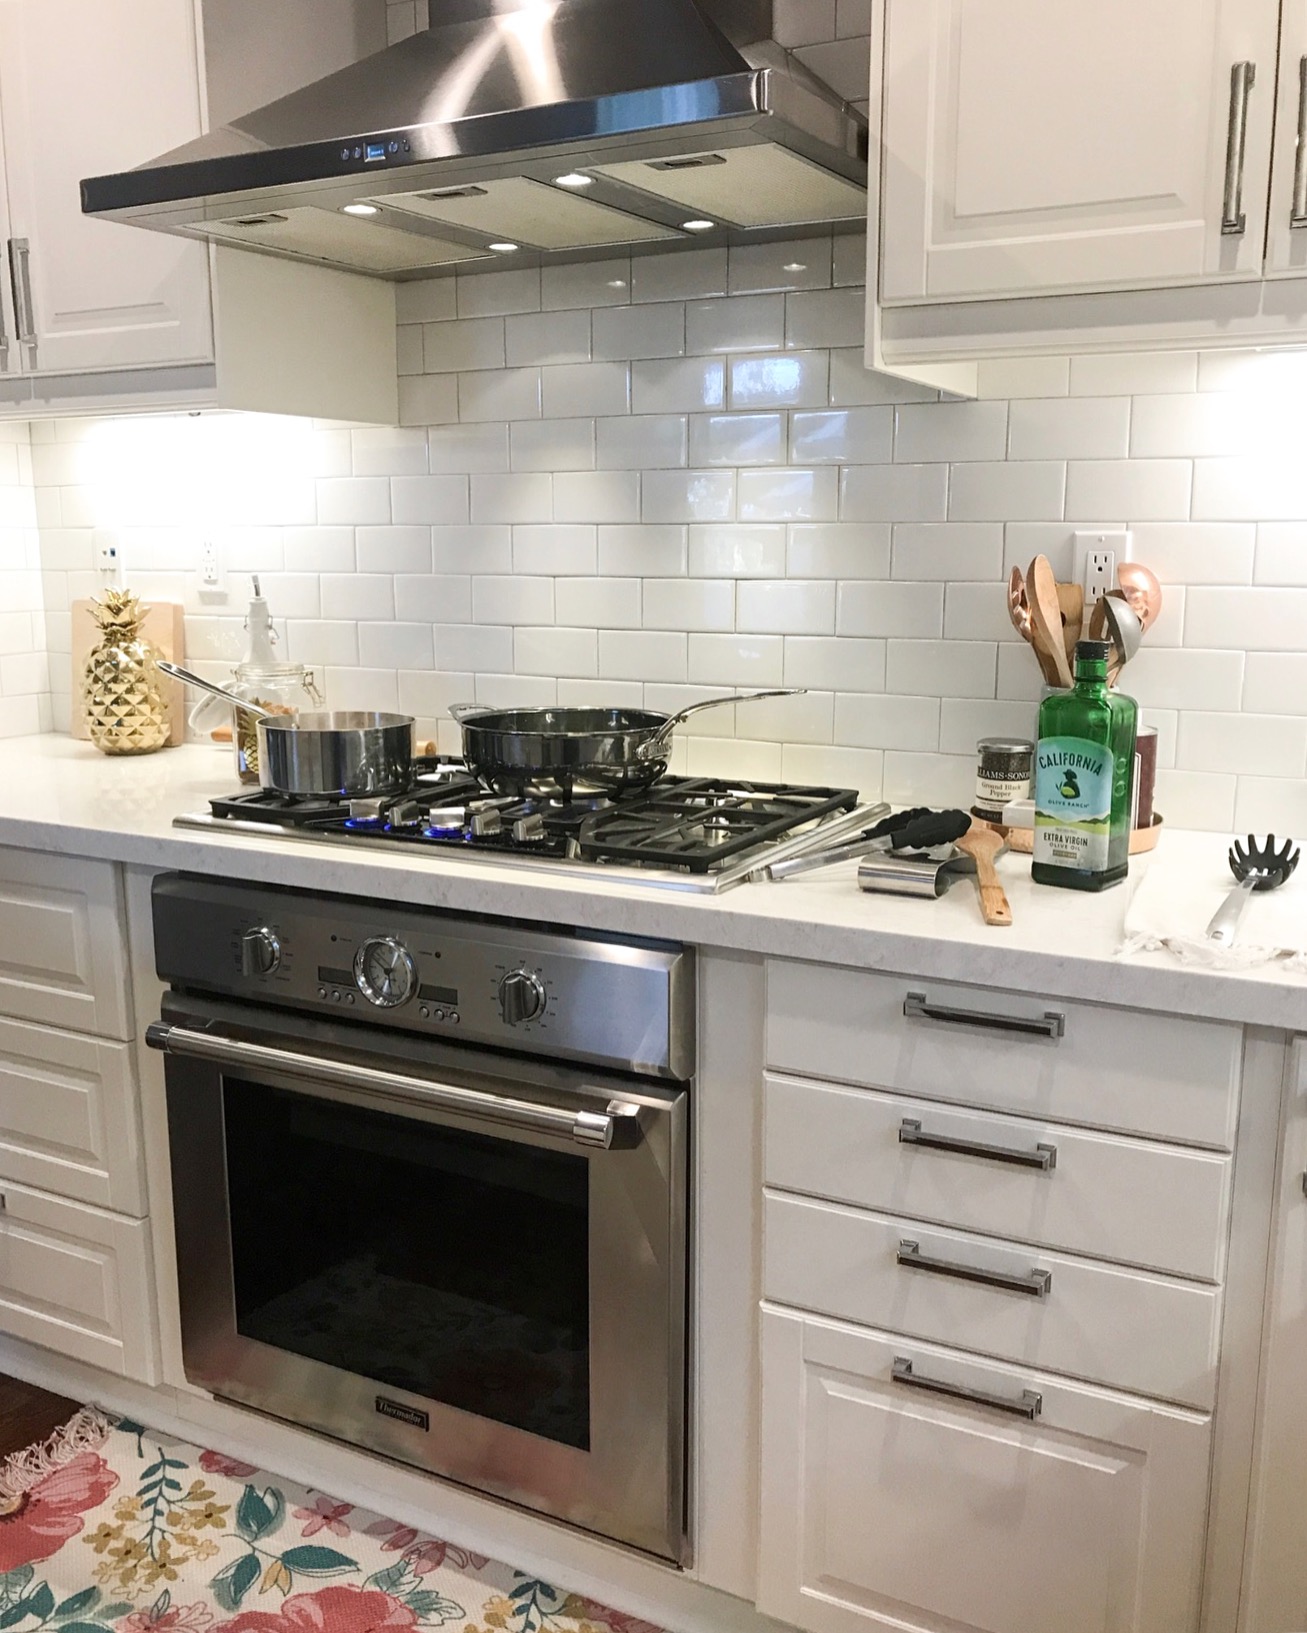
This is a picture of our kitchen in action that I recently posted on IG. We searched for appliances that would really work for our cooking needs. We also removed the microwave and cabinet combo and replaced it with a Zephyr professional range hood. Upgrading our appliances definitely added a most custom look to our kitchen. The range hood makes all the difference in eliminating cooking odors and compliments the look of our appliances beautifully! We chose this microwave that “lives” in a separate cabinet. It’s compact and gets the job done! We had our contractor and appliance installation crew work with us to fit our oven and gas cooktop into the IKEA oven cabinet. Our contractor made the necessary adjustments and it fit perfectly! Of course choosing a slide-in range or freestanding oven would have made this much easier but we loved the features our wall oven offered.
Tip #4: Account for “Filler” Areas and Spaces Between Your Cabinets
When designing and ordering your IKEA kitchen work with your IKEA kitchen designer and contractor to help you determine the amount of space between each cabinet. For example, you may have enough space to insert a wine cabinet like we did or a smaller cabinet drawer for spices. This eliminates large areas of filler space and will make your kitchen look more custom. There are so many sizes and options for your cabinets so be creative and utilize the space in your kitchen wisely and efficiently.
Tip #5: Design with Intention
When selecting whether you want doors or drawers and how to organize and arrange the inside of the cabinets think about how you use your current kitchen and determine what is missing or lacking. You can see a tour of our kitchen cabinet organization here. Think about what would make your life easier? For example we added pull out drawers in our island and have our kiddos dishes, bowls, and cups easily accessible for them. It’s important to consider not only the aesthetic of the kitchen but the way you will interact and use your kitchen on a daily basis. Function is one of the reasons why we choose IKEA for our kitchens! Customize your cabinet selection to work with your life. Make your kitchen work for you!
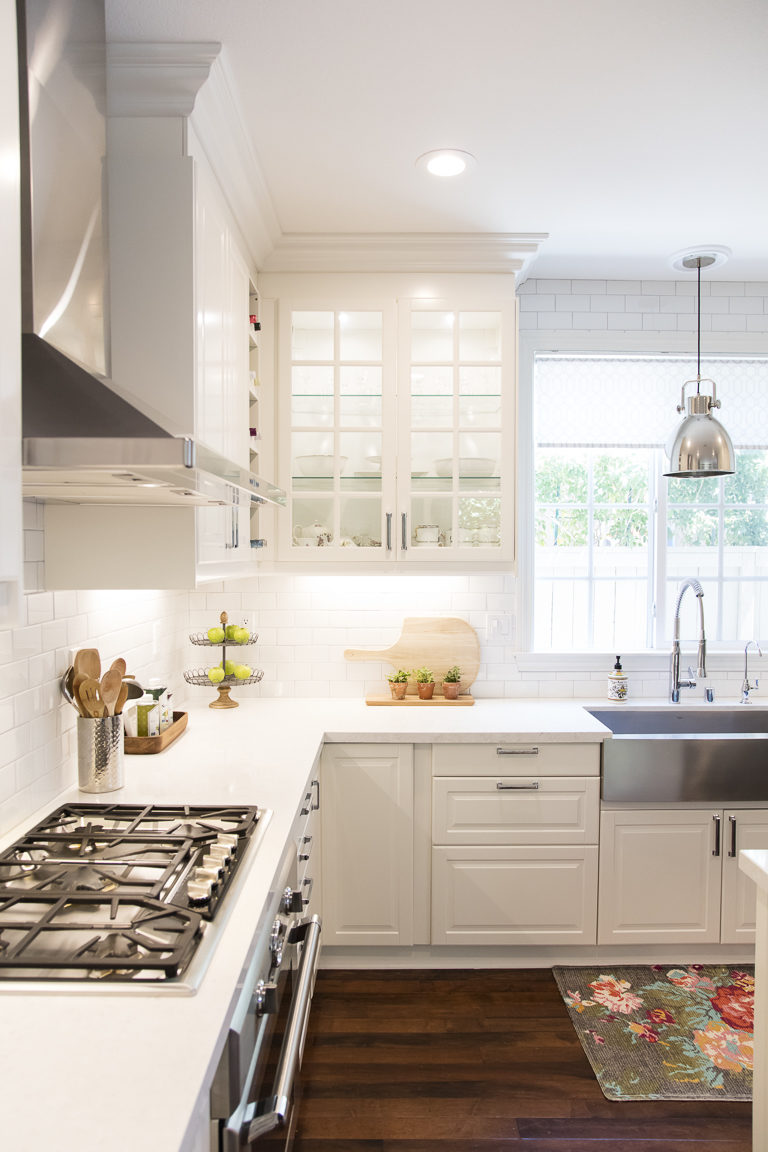
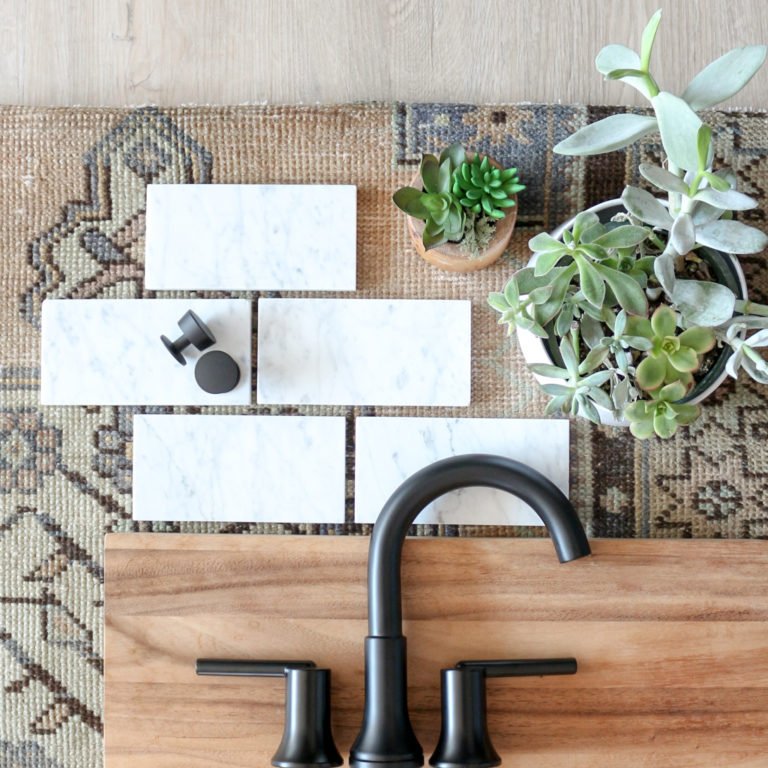
Tip# 6: Choose a Sink and Faucet that You Love – Don’t Feel Obligated to go with the Standard Options
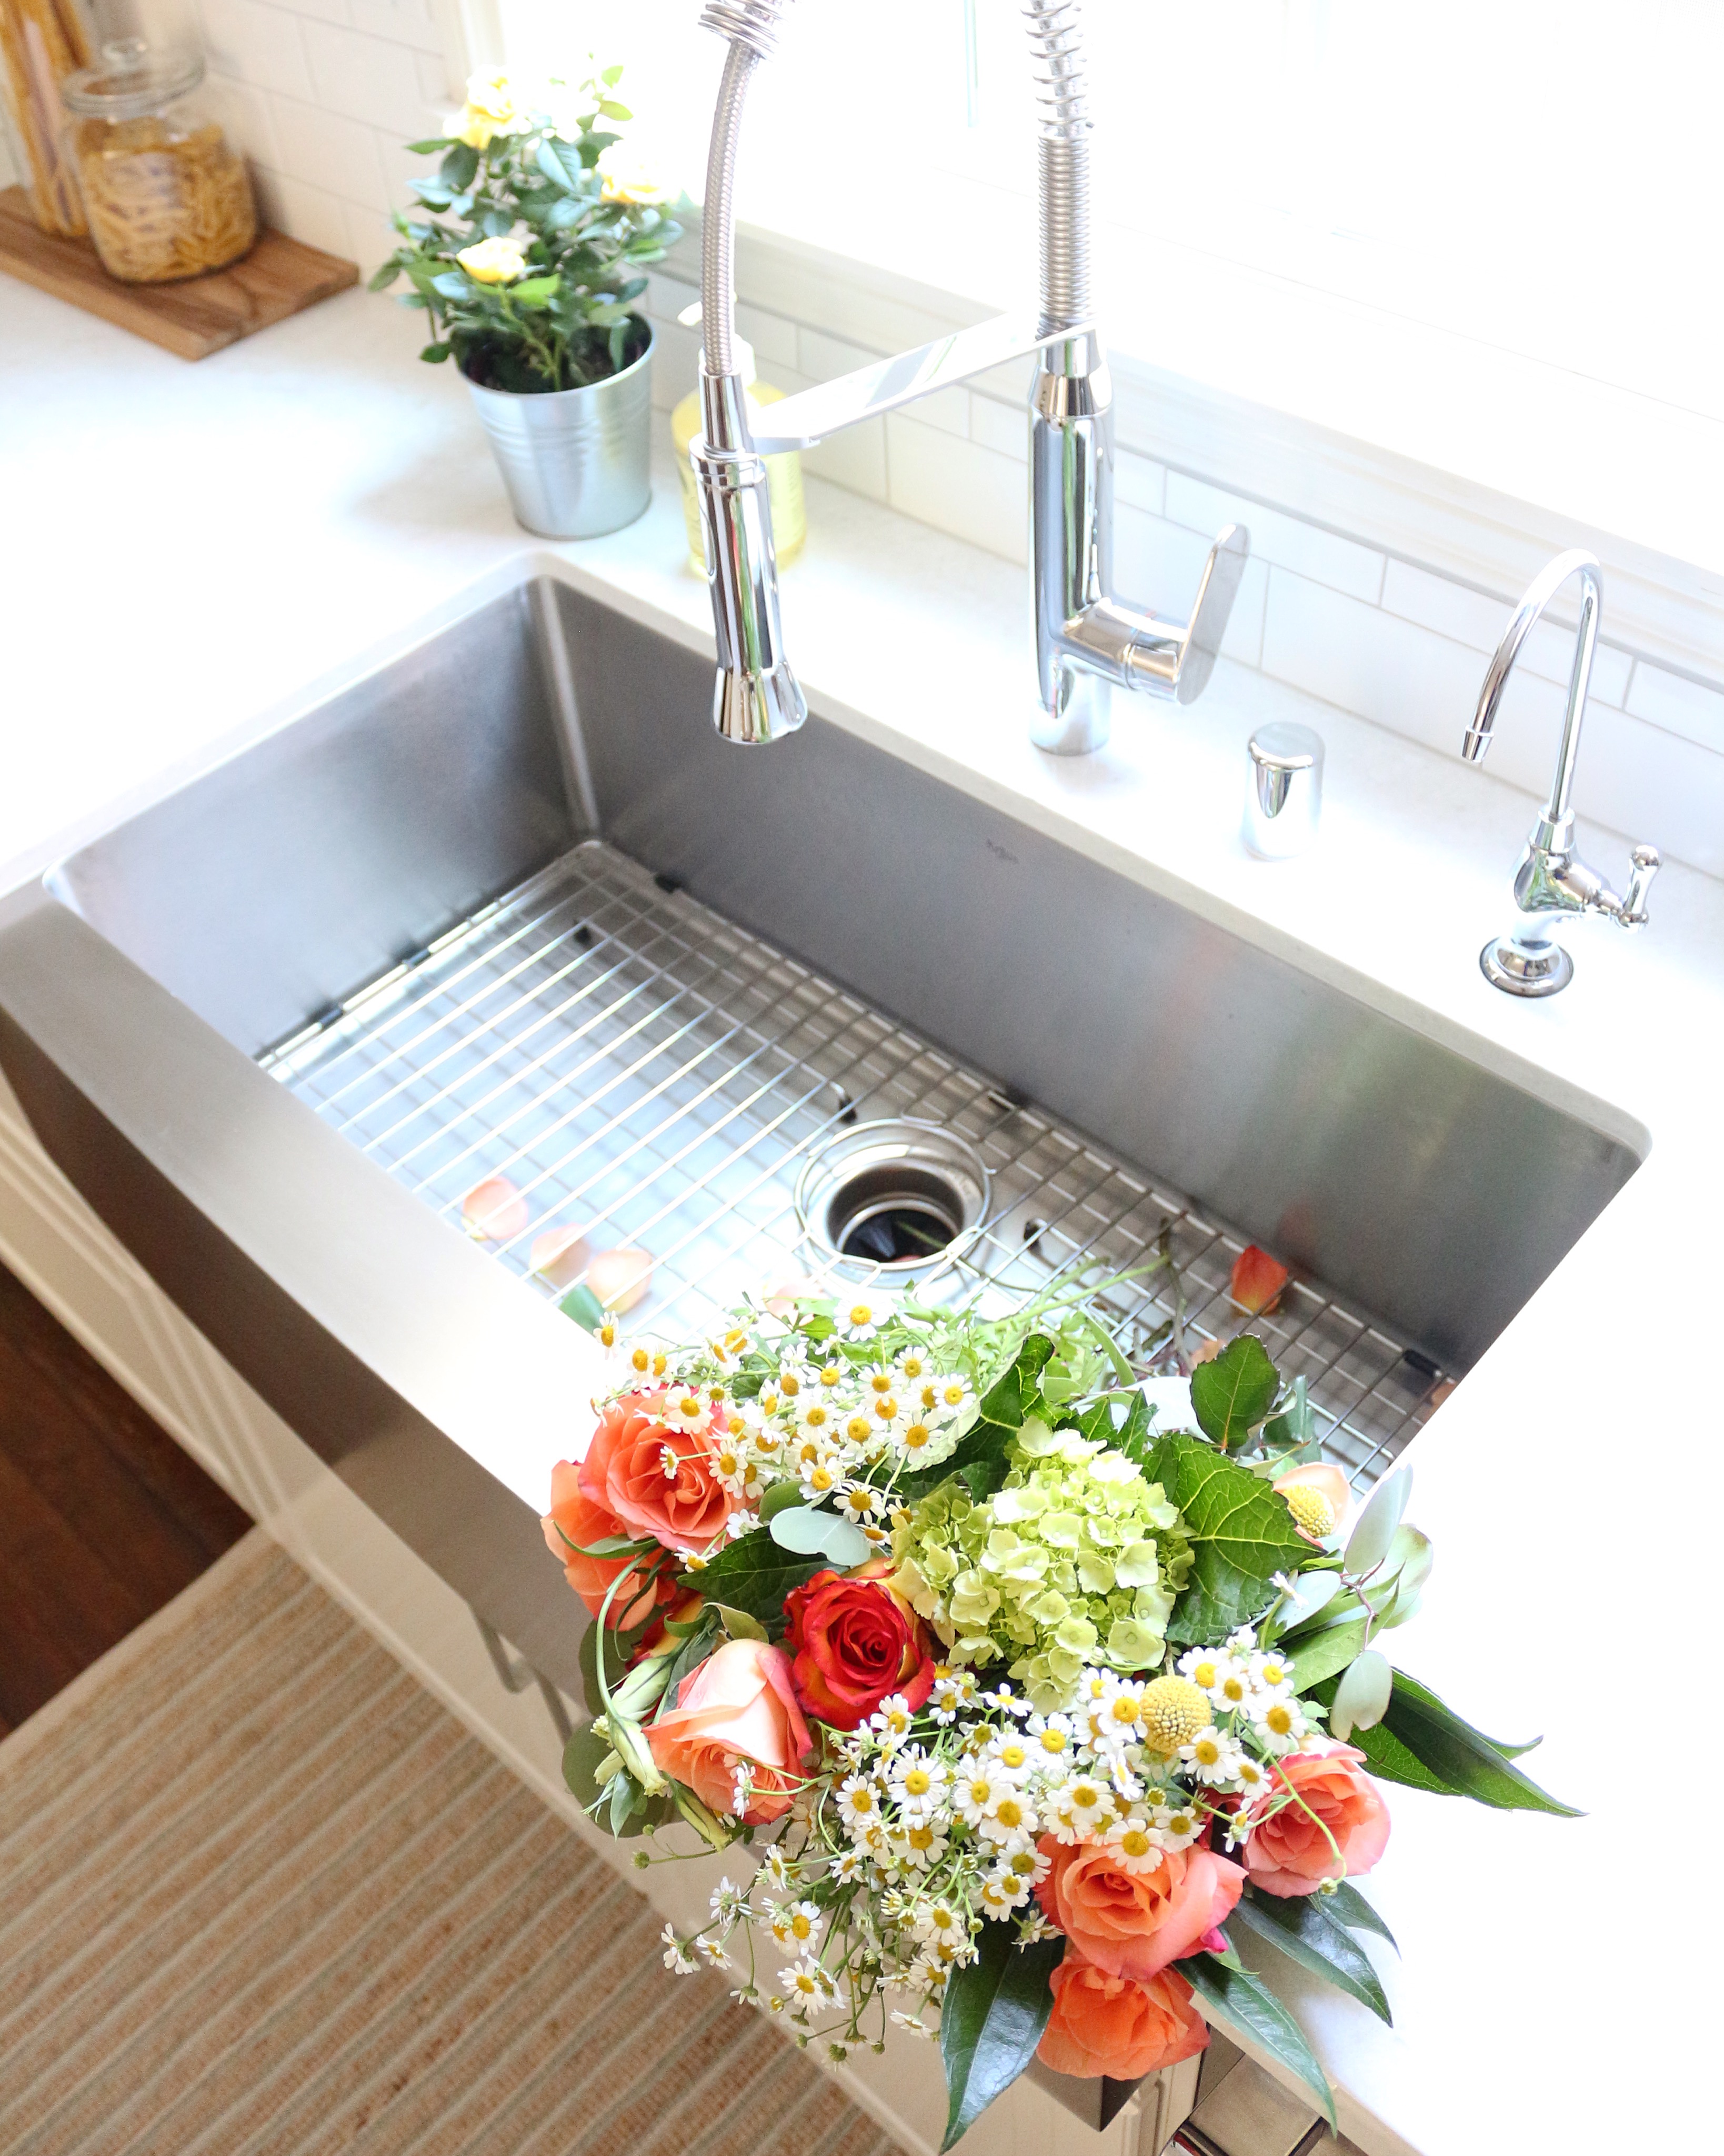
We worked with our contractor to fit our 36″ stainless steel farmhouse sink into our IKEA sink cabinet. He made some adjustments to the cabinet and added filler pieces under the cabinet to give it a custom look. You don’t have to limit your choices to IKEA’s sink and faucet options! Get what you want and work with your contractor to make the necessary adjustments to your sink cabinet – the end result will totally be worth it! Our faucet is one of our favorite items and you can see how it works in my video below.
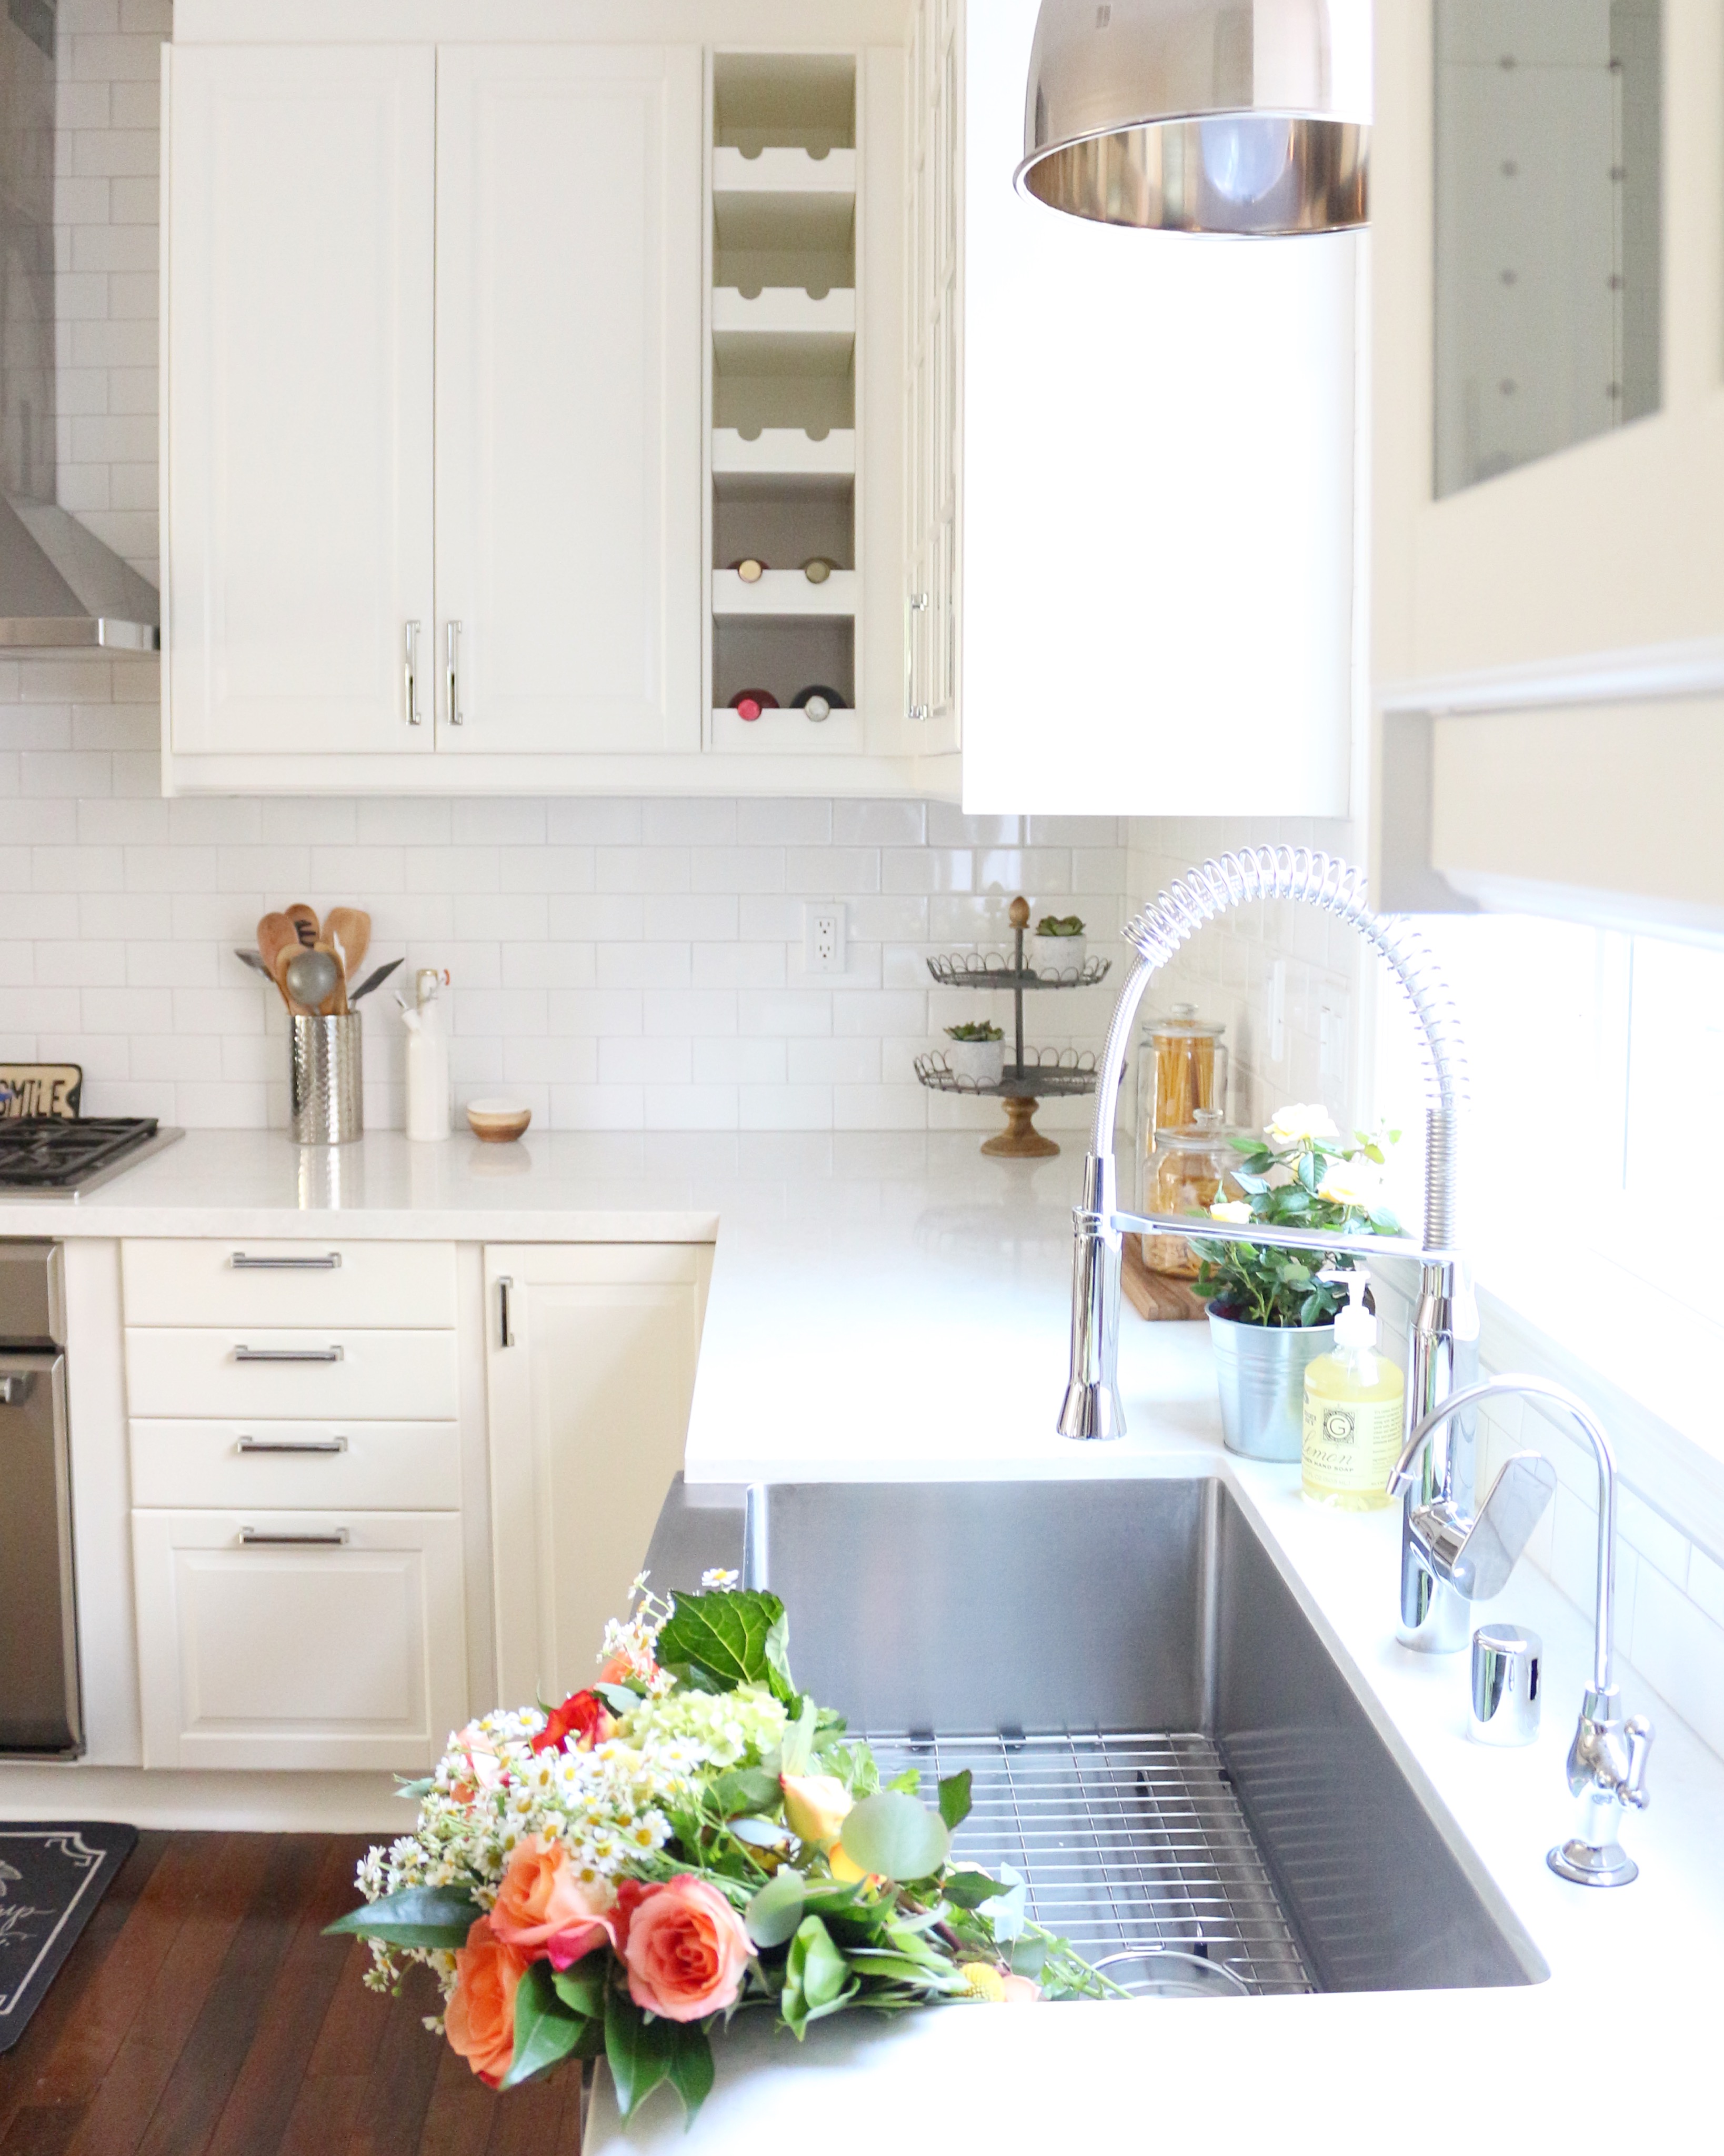
Tip #7: Add Glass Cabinets and Interior Cabinet Lighting to Upper Cabinets
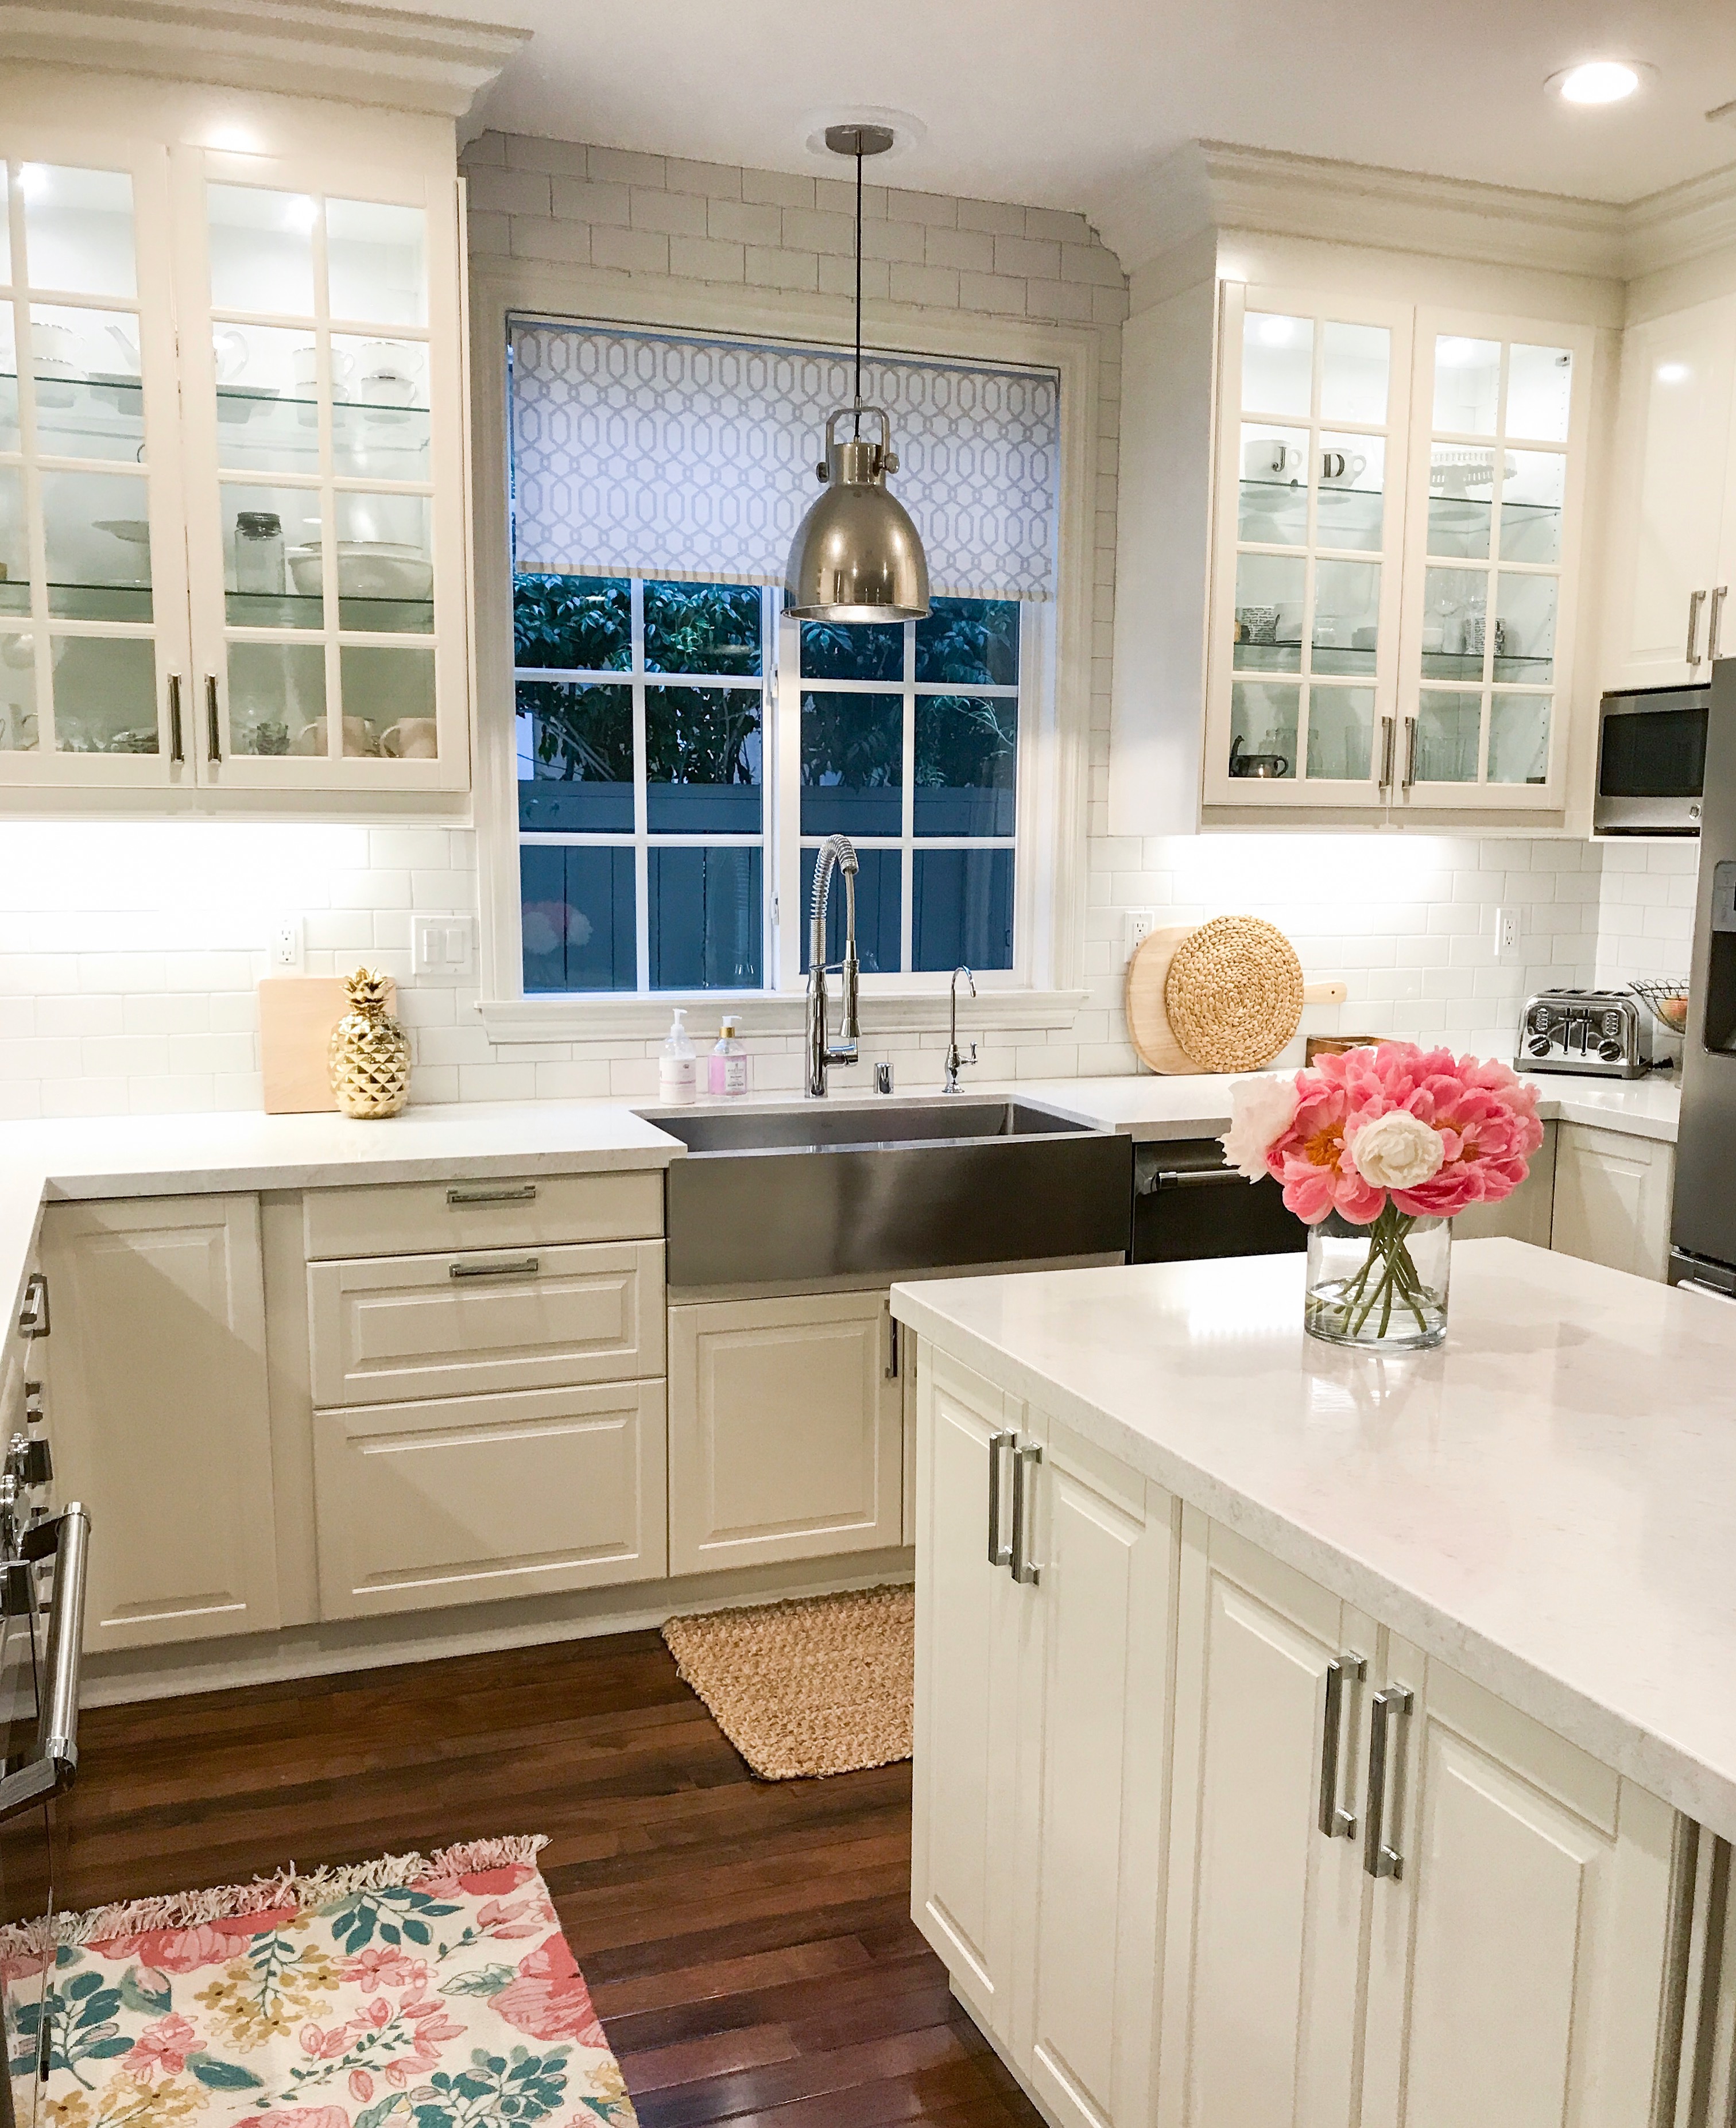
Think beyond regular door fronts and add glass to some of your cabinets. Interior cabinet lighting adds ambiance and showcases glass cabinets beautifully. To create a more light, airy and brighter look choose glass and floating shelves as options to open your space. This will also add variety and interest to your kitchen design.
Tip #8: Add Under Cabinet Lighting
Under cabinet lighting is an upgrade you don’t want to skimp on. It makes such a difference and illuminates your prep and cooking area. It also makes a kitchen feel bigger by eliminating dark shadows underneath cabinets. I’m not sure what I would do without it as I use it everyday. We chose an LED option that will stand the test of time! I’ve linked some options to shop in the pics below.
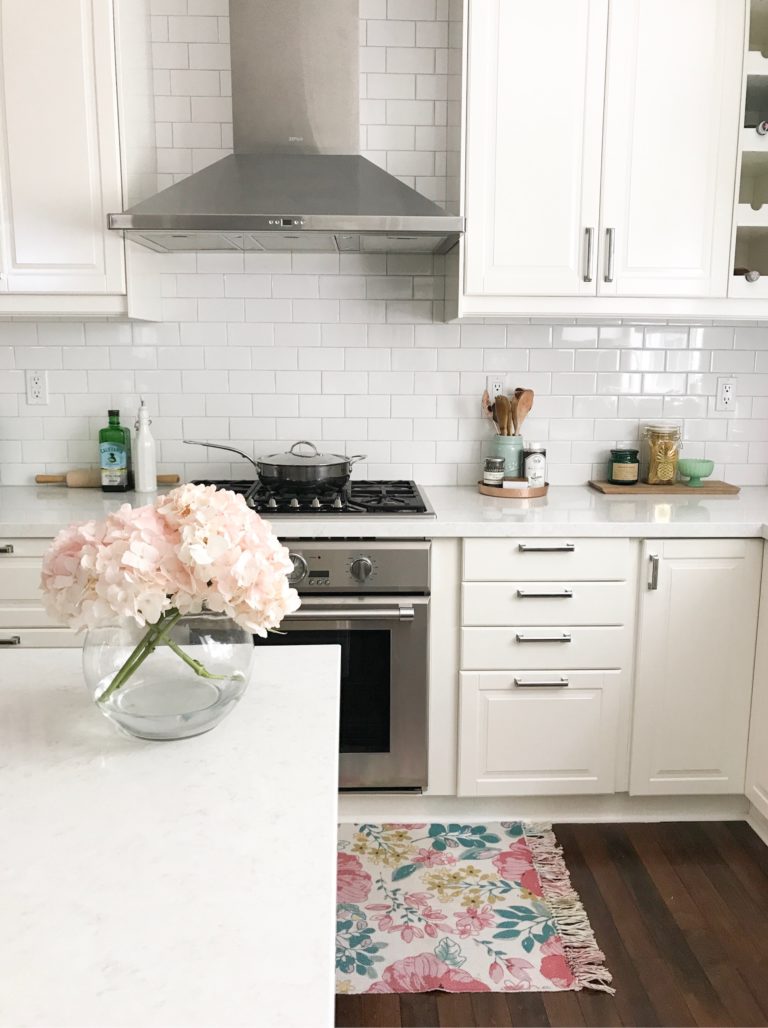
Tip #9: Choose a Countertop and Backsplash that Compliments Your Cabinets
Take a sample cabinet door and place it next to your countertop and backsplash options. Which ones do you think coordinate best? Pulling together a cohesive look will give your kitchen that more custom and finished touch. I chose a classic white subway tile and a quartz with tones of white and grey. I used a grey grout color to tie in the white and grey. Our exact quartz can be found here. It is so easy to maintain and clean and looks beautiful all the time!
Tip #10: Recessed Lighting – Add or Update
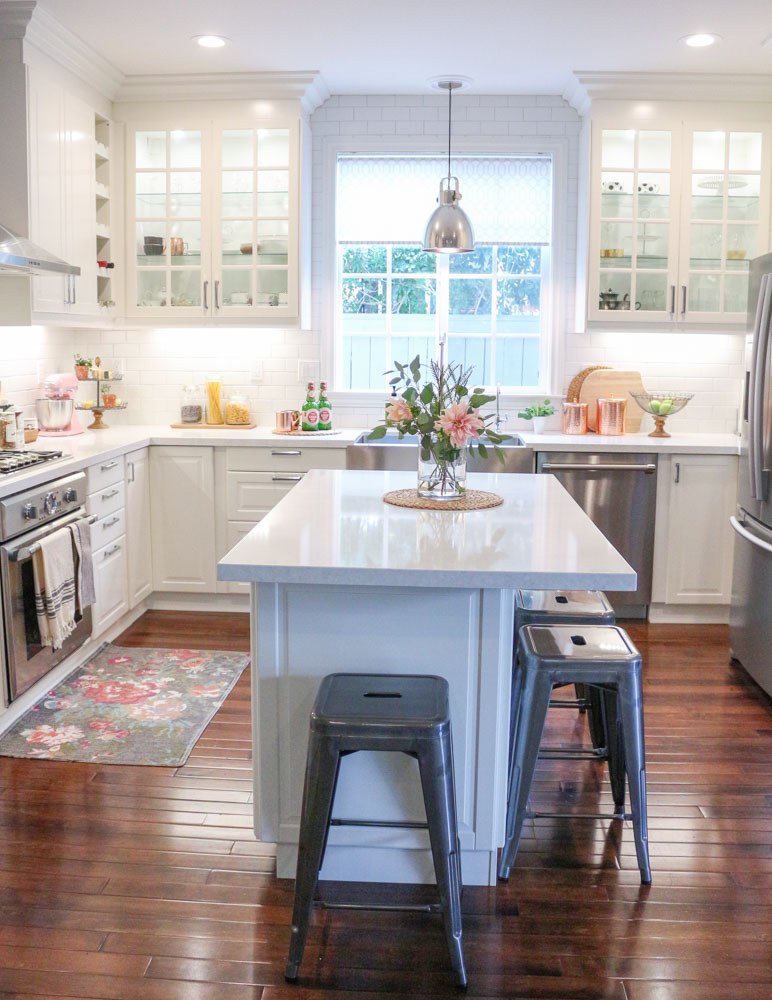
If your recessed lighting is old give it an update with soft white LED recessed cans. If you don’t have recessed lighting consider adding it to your kitchen and if appropriate add a pendant light over your sink, island or peninsula to give it some extra personality!
I hope you found these 10 tips for a more custom IKEA kitchen helpful! Customizing your IKEA kitchen can be so much fun and you can stick to your budget by focusing on the budget-friendly options to give your kitchen the extra finishing touches. Do you need assistance with your IKEA kitchen? I’m gathering an interest list now for e-design kitchen consultation services – contact me here for more info. Stay tuned for our next IKEA kitchen remodel – more coming soon!
Here’s a tour with my tips:
Thanks as always for stopping by!

*Affiliate links used, all opinions my own.
Hi,
Can you please tell me the distance between the top of the cabinet and the ceiling (the width of your crown molding)? I have a choice between 40″ cabinets to the ceiling with no light rail or the 30″ with 7″ of space where I will need to use crown. Many Thanks!
I found this post and I am literally about to cry from happiness. I am installing cabinets from ikea now and while the drawers are all flush I keep having gaps with the cabinet doors on ALL of them. Were you able to get it worked out?!?
Hi! Yes – it’s always tricky but you have to adjust the hinges to get the doors to align properly – it can be done. Having the boxes match the color is also so key – for example – white boxes with white cabinet doors and the dark brown boxes with darker doors – this helps to minimize seeing those tiny gaps. Hope this helps! Beth
The kitchen is generally considered as the heart of any home where people spend the most time. The decoration of it is the best way to insert your personality and represent yourself. So these all tips including the elimination of gap between the top of the cabinet and kitchen ceiling, up gradation of kitchen hardware, the best and latest selection of a sink and faucet etc. are the best option to go with whether anyone wants to upgrade their kitchen space. With a selection of latest kitchen sink, it gives the best appearance by the right selection of kitchen sink according to the countertop.
Hi Beth, I see that the corner in your kitchen where the wine shelf is, is not a blind corner. How is the corner secured then? Is hollow space covered from bottom and top? Did the IKEA team did the installation for you? I would appreciate your advise here.
Hi! The cabinet is secured to the wall – We chose not to cover the hollow space underneath but I definitely recommend it – we used a local San Diego contractor who specializes in IKEA cabinets – definitely recommend using someone who has experience with IKEA cabinets. Hope that helps!
The kitchen is generally considered as the heart of any home where people spend the most time. The decoration of it is the best way to insert your personality and represent yourself. So these all tips including the elimination of gap between the top of the cabinet and kitchen ceiling, up gradation of kitchen hardware, the best and latest selection of a sink and faucet etc. are the best option to go with whether anyone wants to upgrade their kitchen space. With a selection of latest kitchen sink, it gives the best appearance by the right selection of kitchen sink according to the countertop. In order to get the info of the best selection of kitchen sink that best suits your kitchen cabinet I would like to suggest you to visit: https://www.westernabrasive.com/latest-kitchen-sink-trends-that-will-rule-over-the-forecast-period
Gorgeous kitchen! I was wondering the dimensions for the island cabinet and counter please?
Thank you for your kind words! I believe we did (2) 24″ wide cabinets for the island and countertop to cover with an additional 12″ overhang for the stools.
Thank you so much for this post! Can you tell me your wall color? I’m so afraid I’ll go too yellow, or clash with these cabinets. I can’t find it on the blog. Thanks so much!
Awe you are so welcome! So glad you liked the post & thank you for stopping by to read it 🙂 We used Modern Grey by Sherwin Williams – its a beautiful neutral light grey/white.